Don’t you just love when you can reuse or upcycle something for the kids!
We needed a back-up backpack for the year {you know, for the days that the regular one gets left at school or to use as a bag for afterschool activities}.
I really didn’t want to purchase another one since we have so many old ones from previous years. But the issue is many of the older ones have ‘little kids’ pictures on the front or are pretty worn out.
So, I decided to see if we could do a little DIY project and upgrade one of the backpacks to something cool that we could use.
DIY Chalkboard Backpack
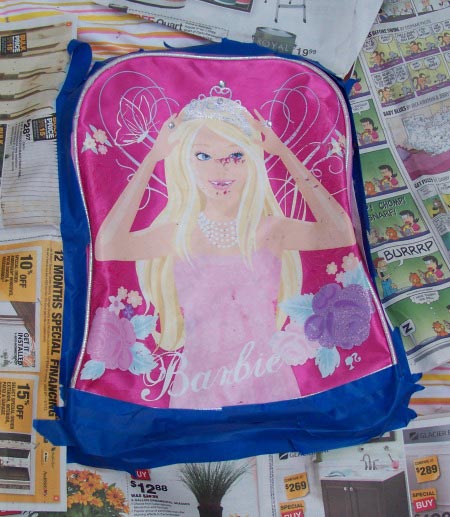
Our first step was to remove any extra ribbons or items hanging off the area that would need to be painted.
As you can see, the picture is pretty scratched up and peeling in a number of places. We had to remove a few shiny pink ribbons which were easily cut off using scissors.
Then came to tough part – taping off the areas you don’t want to paint. We taped paper around most of the backpack. I used painters tape but it didn’t stick really well so this step took much longer than I anticipated. I had to double tape the paper to make sure all areas would stay covered during the painting process.
My daughter wanted to keep the strip of shiny material at the bottom so we taped over that also {which was a really good call on her part as you’ll see later}.
Based on our results, I would recommend that you choose a backpack that has a full front area that can easily be covered over when you paint. Trying to tape off the area that needs painting was the most challenging part of the project. I would also suggest filling the backpack with books to help it stay in place during the painting process (we had a windy day so I tucked a large rock inside).
Next, we sprayed the front area with primer. Most of our backpacks have that shiny plastic front on them so I wasn’t sure if the blackboard paint would adhere directly to that material.
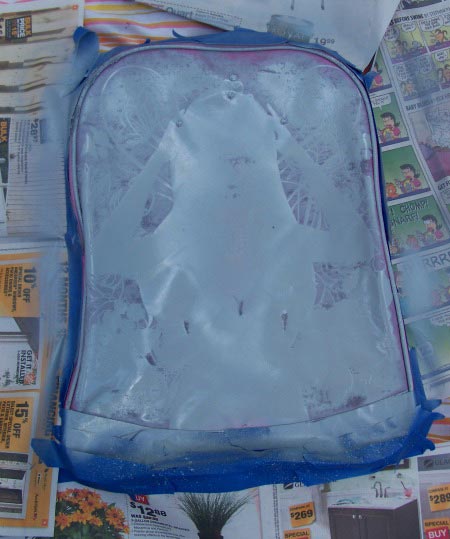
After the first coat, I was really glad that I chose to use primer. As you can see, some of the areas just didn’t cover very well, so I put on a second coat of primer. I used a spray paint primer so it was quick and easy!
Then we applied the blackboard spray. I used Krylon Chalkboard Spray Paint and let it dry for 24 hours before we tried any chalk. I am not a paint aficionado; this was just what I had on hand. I’m sure many types would work for this project, just read the label when you purchase.
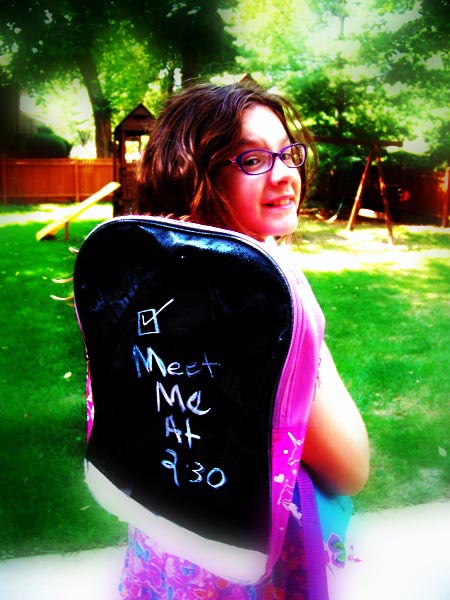
TA-DA! It turned out quite nice. There were a few light areas so I may give it another coat of blackboard paint if it fades. And I’m so glad that she wanted to keep the white shiny material at the bottom.
Most important – my daughter loves it.
The chalk works beautifully and she had a keen observation: “Hey Mom, now I can write down what I need the next day and check it off once it’s packed”. Smart girl!
Have you done any upcycling recently?
I’d love to hear how it turned out!